 |
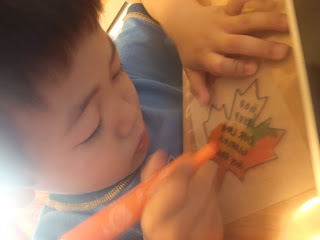
| Shrinky Dink pre-bake status |
Canada celebrates 145 years of history as a soveriegn nation. There is even a cool bible verse that is inscribed on the Parliament Hill somewhere but it describes Canada very well to a T.
Psalm 72:8 "He shall have dominion also from sea to sea, and from the river unto the ends of the earth." It just sounds so awesome in King James. Though the PM would actually describe Canada, sea to sea to sea. but here the "ends of the earth" would encompass the North Pole!
The Sunday School teacher in Lincoln's class today told us about that Bible verse today and he sang a rendition of the kids song, God Made Me.
"God made Canada, and God made the seas.
God made the beavers, and God made the trees.
God made moose that roam, and God made the geese.
But the best of it all; the best thing of all: God made me!"
The Sunday School teacher`s lovely wife set up a special Canada Day craft for the kids. She traced a copy of the Maple Leaf on a small section of the Shrinky Dink plastic and gave the kids pencil crayons to colour as best they could.
It was a take home craft to be completed at home (baking time and directions to be shared below) but I think Lincoln enjoyed scribbling. I coloured half the leaf red myself and used white to retain his work. Maggie and AJ opted to try something different with silver or proper leaf colours.
"In summer leaves are green. But the Canada Day leaves are red, mommy" OK
Tomorrow after breakfast we will bake the Shrinky Dink for 1-3 minutes and then they'll get to see why it is called a shrinky dink.
Happy Canada Day everyone. How did you celebrate today?
TIPS:
#1 Colour the rough side of the material with pencil crayons or markers (wax crayons will just melt away)
#2 Cut only a smooth round outline around your design. Avoid sharp pointy edges as these become very very pointy. Observe the round outline around the maple leaf in the first image.
#3 It shrinks fast, in a blink of an eye so keep watching safely!
#4 Use a glue gun to attach a small magnet to the back. Or punch a hole before the shrinking to achieve a threadable hole for a necklace.
Shrinky Dink Baking Instructions
By Sheree N.
Do not microwave. Toaster oven is ideal or the conventional oven will work as well.
1. Preheat oven to 325 F
2. Place Shrinky Dink on cookie tray, coloured side up and place into pre-heated oven.
3. Watch as your Shrinky Dink shrinks. Bake approximately 1-3 minutes. After pieces lay flat, allow an additional 30 seconds of baking time to complete the process.
4, Remove Shrinky Dink and lightly press flat with folded paper until cooled, about 15 seconds.
Note: During the baking procss, there might be a time when the center is indented but the shrinking has stopped. Be patient; in time, the center will flatten out as well.


No comments:
Post a Comment